
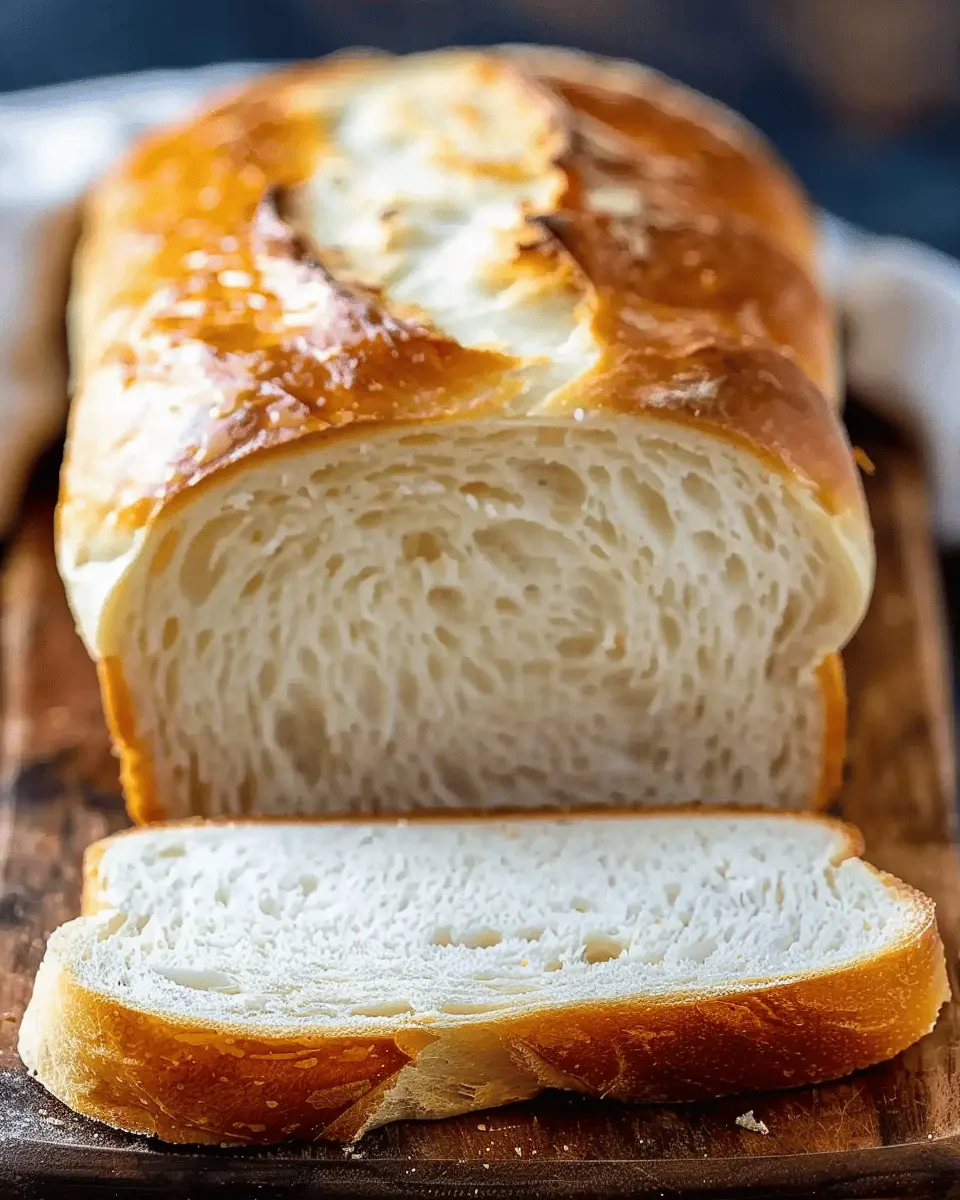
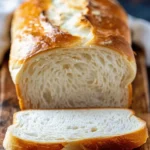
Introduction to Easy Homemade White Bread
When it comes to baking, few things are as satisfying as crafting your own easy homemade white bread. The aroma that fills your kitchen as the dough rises is not just comforting; it’s an experience that connects you to a long history of home cooks sharing love through food. Why should you consider giving this a try instead of buying bread from the store? Let’s dive into the benefits.
Why Homemade Bread is Worth It
Making your own bread at home may seem daunting, but it’s incredibly rewarding. First and foremost, you have complete control over the ingredients. Most store-bought breads are filled with preservatives and artificial additives that may not align with a healthy lifestyle. When you choose to bake at home, you can use high-quality ingredients and even experiment with different flours or seeds to suit your taste.
Moreover, homemade bread often tastes better than its commercial counterparts. The freshness of a loaf that’s just come out of the oven is unmatched. Imagine slicing into a warm loaf and slathering it with butter—now that’s a delightful treat that no store-bought option can replicate! According to the Whole Grains Council, baking your own bread allows you to incorporate whole grains and other nutritious elements for a more balanced meal.
One of the best reasons to embrace baking is the connection it fosters—whether with family, friends, or even your own creativity. Gathering ingredients and kneading dough can be quite therapeutic after a long day at work. Have you ever considered turning a mundane evening into a fun baking experience? You might just discover a new passion!
Lastly, making your own easy homemade white bread can save you money in the long run. While the initial investment in flour and yeast might feel like a splurge, think of how many loaves you can make for the cost of one from the store. Plus, you’ll have leftovers for sandwiches, toast, and more, which is a fantastic way to elevate your meals throughout the week.
In the following sections, we’ll guide you through a simple recipe, breaking down each step to ensure success. Get ready to transform your culinary skills—your taste buds will thank you!
Ingredients for Easy Homemade White Bread
Essential Ingredients You’ll Need
Making your own easy homemade white bread doesn’t require a long list of complex ingredients—just some basic pantry staples! Here’s what you’ll need:
- All-Purpose Flour: About 4 cups. This will give your bread that soft, fluffy texture.
- Active Dry Yeast: 2 teaspoons; this is what helps your bread rise beautifully.
- Warm Water: 1.5 cups (around 110°F). This is essential for activating your yeast.
- Sugar: 2 tablespoons. A little sweetness helps feed the yeast for a better rise.
- Salt: 1.5 teaspoons. This adds flavor and strengthens the dough structure.
- Butter: 2 tablespoons (melted). This will enrich your bread, creating a tasty crust.
With these simple ingredients, you’ll have everything you need to whip up a delicious loaf of homemade bread. Plus, it’s an excellent way to impress friends or family with your baking skills! Want to dive deeper into the science of baking? Check out King Arthur Baking for some fascinating insights.
Step-by-Step Preparation of Easy Homemade White Bread
Baking bread is an incredibly satisfying experience, especially when you get to savor the delicious aroma wafting through your home. This easy homemade white bread recipe is perfect for beginners, taking you step-by-step through the process. Let’s roll up our sleeves and dive in!
Activating the Yeast
The first step in our journey to making easy homemade white bread involves activating our yeast. This is crucial because yeast is the magic ingredient that helps your bread rise and creates a lovely texture. To do this, combine 2 teaspoons of active dry yeast with 1 tablespoon of sugar in a small bowl. Next, pour in 1 cup of warm water (around 110°F or 43°C)—the warm (but not hot!) water will wake up the yeast. Allow this mixture to sit for about 5-10 minutes, or until it becomes frothy. If your yeast doesn’t foam, it may be inactive—consider trying a new packet!
Mixing the Dry Ingredients
While the yeast is activating, it’s a great time to mix our dry ingredients. In a large mixing bowl, combine 3 cups of all-purpose flour, 1 teaspoon of salt, and an optional 2 tablespoons of vegetable oil. The oil not only adds flavor but also helps keep your bread moist. Use a whisk or a fork to thoroughly mix everything together, ensuring the salt is evenly distributed.
Combining Ingredients
Once your yeast mixture is frothy and bubbly, it’s time to bring everything together. Gradually pour the yeast mixture into your dry ingredients, stirring as you go. The dough will start to come together and may seem a bit sticky initially. That’s perfectly normal! Don’t be tempted to add more flour right away; instead, let it rest for a few minutes to absorb the moisture fully.
Kneading the Dough
It’s time to get your hands a little messy! Sprinkle a sanitized work surface with a bit of flour and turn out your dough. Knead the dough for about 8-10 minutes, pushing and folding it until it feels smooth and elastic. An excellent way to know you’re done is that the dough should spring back when you poke it. Kneading develops the gluten, resulting in a nice, chewy texture.
First Rise
Now, place your kneaded dough in a lightly greased bowl, covering it with a clean kitchen towel or plastic wrap. Find a warm spot in your kitchen (like near a sunny window or on top of the fridge) and let it rise for about 1-2 hours or until it has doubled in size. This time allows the flavors to develop and the texture to improve.
Shaping the Loaf
After your dough has risen, it’s time to shape it into a loaf. Punch down the dough gently (to release the air) and turn it out onto a lightly floured surface. Shape your dough into a rectangle, then roll it up tightly, pinching the seams to seal. Place the shaped loaf seam-side down in a greased 9×5 loaf pan.
Second Rise
Now for the final rise! Cover the loaf with your towel again and allow it to rise for another 30-45 minutes until it’s puffed up. It might look like it’s ready to burst with deliciousness. This is the time to preheat your oven to 375°F (190°C).
Baking the Bread
Once your dough has risen, it’s time to bake! Place the loaf in the oven and let it bake for about 30-35 minutes until the top is a beautiful golden brown. You’ll know it’s done when you tap the bottom of the loaf and it sounds hollow.
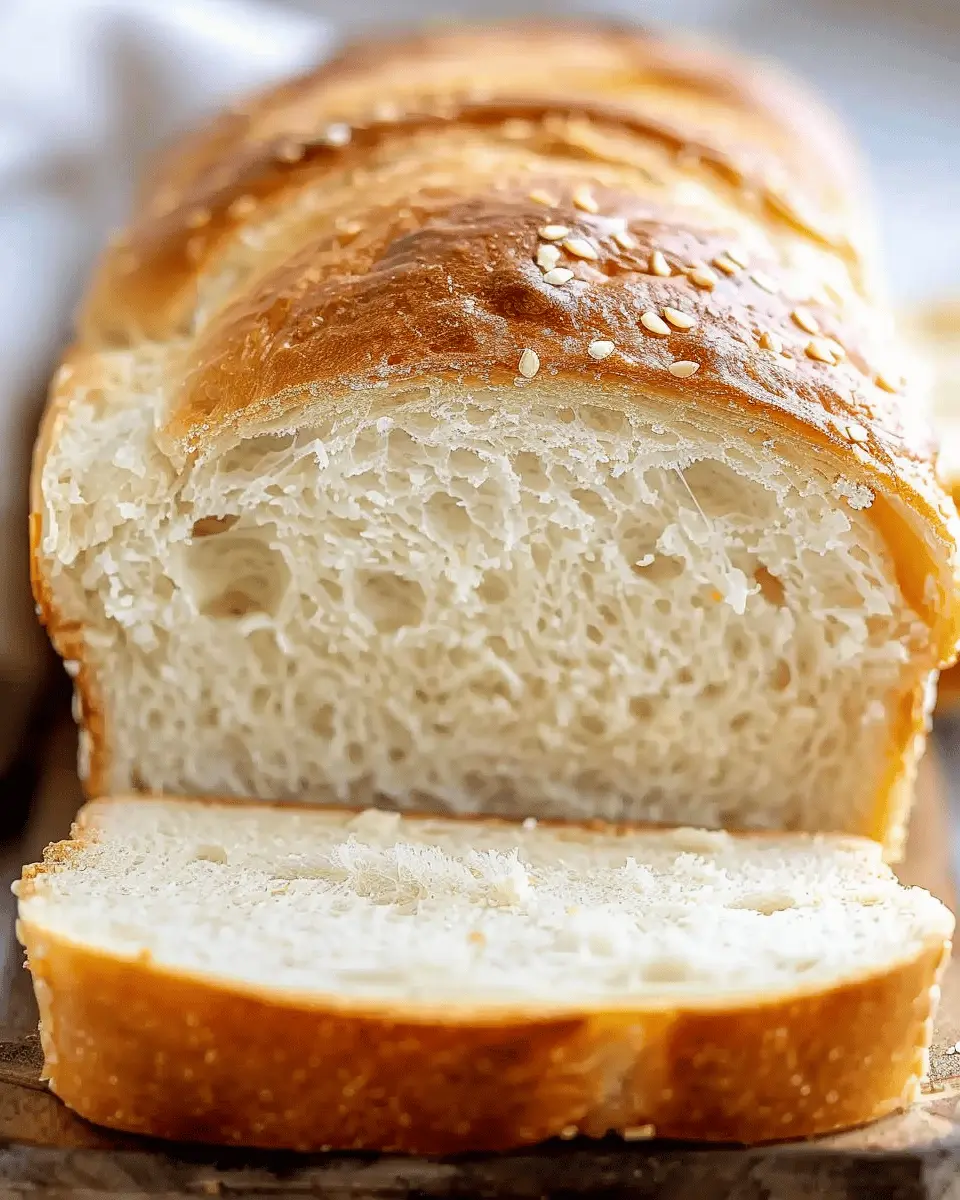
Let it cool for at least 10 minutes before slicing into that beautiful easy homemade white bread. Enjoy your creation toasted with a bit of turkey bacon or as a delightful accompaniment to your favorite soup.
Happy baking!
Variations of Easy Homemade White Bread
Flavored White Bread Options
Once you’ve mastered the basics of easy homemade white bread, it’s time to have some fun with flavors. Adding unique ingredients can elevate your bread game and impress your friends at your next brunch. Here are some delightful variations to consider:
-
Herb Infusion: Mix in dried herbs like rosemary, thyme, or oregano for an aromatic twist. Just a tablespoon or two can transform your bread into a savory sensation.
-
Sweet Touch: A tablespoon of honey or a sprinkle of cinnamon can give your bread a hint of sweetness. This is perfect for breakfast or when paired with your favorite spread.
-
Cheese and Garlic: Adding grated cheese and minced garlic to the dough creates a rich, flavorful bread that pairs well with soups and salads.
For these tips, check out America’s Test Kitchen.
Adjusting for Whole Wheat or Gluten-Free
If you’re looking to expand your horizons beyond the classic easy homemade white bread, you can easily adapt the recipe for whole wheat or gluten-free options.
-
Whole Wheat: Substitute up to half of the all-purpose flour with whole wheat flour for a nuttier flavor and added nutrients. Be prepared to slightly adjust the liquid as whole wheat absorbs more water.
-
Gluten-Free: For a gluten-free version, use a gluten-free flour blend that has a mix of starches and proteins. Adding a bit of xanthan gum can help replicate the texture of traditional bread, ensuring it doesn’t crumble.
Experimentation is key! Don’t hesitate to tweak and adjust until you find your ideal loaf. For additional insights, consider resources from the Gluten Intolerance Group.
These simple variations not only keep things exciting in the kitchen but also cater to diverse dietary needs, ensuring everyone can enjoy homemade bread!
Cooking Tips and Notes for Easy Homemade White Bread
Making easy homemade white bread can be a rewarding experience, but it’s important to steer clear of common pitfalls.
Common Mistakes to Avoid
- Ignoring the Temperature: Yeast loves warmth! Make sure your water is lukewarm (around 110°F) to activate it without killing it.
- Over-kneading the Dough: A gentle touch is key. Knead just until the dough is smooth and elastic—about 8–10 minutes.
- Not Letting the Dough Rise: Patience is vital! Allow the dough ample time to rise; it should double in size for the best texture.
Troubleshooting Yeast Issues
If your bread doesn’t rise:
- Check the Yeast Freshness: Expired yeast won’t have the leavening power you need. Always check the expiration date.
- Environmental Factors: Cold kitchens can slow down yeast activity. Try placing the dough in a warm, draft-free area—like an oven with the light on.
Feel free to explore this guide on yeast for deeper insights. Don’t hesitate to ask family and friends for help with tips—they might have secrets that make their homemade breads extra special!
Serving Suggestions for Easy Homemade White Bread
Best Spreads and Toppings
When you bake easy homemade white bread, you’re crafting the perfect canvas for a variety of delightful spreads and toppings. Here are some favorites to try:
- Butter: The classic choice often paired with a sprinkle of sea salt or a drizzle of honey for a sweet twist.
- Cream Cheese: Opt for flavored varieties, like herb or chive, for a savory punch.
- Avocado: Smash it with salt and pepper, and enjoy a creamy, nutritious topping that’s perfect for breakfast or a light lunch.
- Nut Butters: Creamy almond or peanut butter pairs excellently with banana slices for a satisfying snack.
Pairing Bread with Dishes
The versatility of easy homemade white bread makes it a fantastic addition to many meals. Consider these pairings:
- Breakfast: Toast with a side of Turkey Bacon and eggs for a hearty start to your day.
- Sandwiches: Layer up chicken ham, fresh veggies, and your favorite condiments for a lunch that hits the spot.
- Soup and Stews: Serve alongside a comforting bowl of tomato soup or beef stew. The bread is perfect for soaking up those rich flavors.
Experiment and enjoy your perfectly baked bread in various ways! For creative ideas, check out sources like Bon Appétit or Food Network.
Time Breakdown for Easy Homemade White Bread
Crafting easy homemade white bread is not only rewarding but also surprisingly quick with the right time management. Here’s a simple breakdown to help you plan.
Preparation Time
Getting started on your bread journey takes about 10-15 minutes. You’ll mix your ingredients, knead the dough, and prepare it for its first rise. Easy, right?
Rising Time
Patience is key here! The dough needs about 1-1.5 hours to rise until it doubles in size. This can be a great time to prep a delicious spread to enjoy with your fresh-baked bread!
Baking Time
Once your dough has risen, it’s time to shape it and bake! Baking will take around 25-30 minutes. Keep an eye on it and enjoy the heavenly aroma wafting through your kitchen.
Total Time
In total, you’re looking at about 2-2.5 hours from prep to the satisfying moment you take your warm loaf out of the oven. This includes hands-on time and waiting for your dough to do its magic! Happy baking!
For more bread-making tips, check out Baker’s Journal for expert insights!
Nutritional Facts for Easy Homemade White Bread
When embarking on your baking journey with easy homemade white bread, understanding its nutritional profile can help you enjoy it even more. Here’s a quick look at what to expect per slice.
Calories
A typical slice of homemade white bread contains around 80-100 calories. Depending on your portion size, it’s easy to fit into most diets.
Carbohydrates
Each slice generally has about 15-20 grams of carbs, primarily from the flour. This makes it a great source of energy, perfect for a busy day or after a workout.
Protein
You can expect around 2-4 grams of protein per slice. While not a high-protein food, pairing it with toppings like turkey bacon or chicken ham can enhance its nutritional value.
For more detailed nutritional insights on homemade bread, check out the USDA’s FoodData Central here.
Frequently Asked Questions about Easy Homemade White Bread
How can I store homemade bread?
Storing your easy homemade white bread properly ensures you get the most out of your delicious creation. Ideally, let the bread cool completely before wrapping it. Use a clean kitchen towel or plastic wrap to keep it soft. For longer storage, consider placing it in a bread box or a resealable plastic bag.
If you’re planning to enjoy it later, a more foolproof method is to slice it and store it in an airtight container in the freezer. Frozen bread maintains its freshness for about three months. Simply toast or reheat slices as needed.
Why is my bread dough too sticky?
A sticky dough can be an unsettling experience for novice bakers. This usually means that you may have added too much liquid or not enough flour. Remember that flour can vary in moisture content, so it’s good practice to add flour gradually. If your dough feels overly sticky, sprinkle in a little bit more flour until it reaches a workable consistency.
Don’t forget that kneading plays a key role too! If you’re curious about the science behind bread-making, this guide on bread dough can be a helpful resource.
Can I freeze homemade bread?
Absolutely! Freezing your easy homemade white bread is a great way to preserve its freshness. Just slice it first, as individual slices freeze and thaw more quickly, making it convenient for toasting or sandwiches. Wrap it securely in plastic wrap or aluminum foil, and then place it in a freezer-safe bag to avoid freezer burn. When you’re ready to enjoy it, simply take out the necessary slices and either toast them directly from the freezer or let them thaw at room temperature.
Creating homemade bread can feel daunting, but with these tips, you’ll be a pro in no time!
Conclusion on Easy Homemade White Bread
Embracing the Homemade Bread Journey
Baking easy homemade white bread is more than just a recipe; it’s a rewarding experience that brings joy to the kitchen. As you embrace this journey, you’ll discover the magic of transforming simple ingredients into something delightful. Imagine the aroma of warm bread wafting through your home, inviting friends and family to gather around the table.
This process not only enhances your culinary skills but also fosters a sense of accomplishment. Remember, practice makes perfect! Don’t hesitate to experiment with flavors or shapes as you grow more comfortable. For more tips and tricks, check out baking blogs like King Arthur Baking or The Kitchn for inspiration. Happy baking!
PrintEasy Homemade White Bread Recipe for Beginners: Soft and Warm Delight
This easy homemade white bread recipe is perfect for beginners. Enjoy soft, warm slices straight from your oven.
- Prep Time: 15 minutes
- Cook Time: 35 minutes
- Total Time: 1 hour 50 minutes
- Yield: 1 loaf 1x
- Category: Bread
- Method: Baking
- Cuisine: American
- Diet: Vegetarian
Ingredients
- 4 cups all-purpose flour
- 2 teaspoons instant yeast
- 2 teaspoons salt
- 2 tablespoons sugar
- 1.5 cups warm water
- 2 tablespoons olive oil
Instructions
- In a large bowl, mix the flour, yeast, salt, and sugar.
- Add the warm water and olive oil. Mix until a dough forms.
- Knead the dough on a floured surface for about 10 minutes until smooth.
- Place the dough in a greased bowl, cover, and let rise for 1 hour.
- Punch down the dough and shape it into a loaf.
- Place the loaf in a greased loaf pan and let it rise for another 30 minutes.
- Bake at 375°F (190°C) for 30-35 minutes or until golden brown.
- Let it cool before slicing.
Notes
- Always check that the water is not too hot, or it can kill the yeast.
- For a softer crust, brush with melted butter after baking.
Nutrition
- Serving Size: 1 slice
- Calories: 120
- Sugar: 1g
- Sodium: 200mg
- Fat: 2g
- Saturated Fat: 0.5g
- Unsaturated Fat: 1g
- Trans Fat: 0g
- Carbohydrates: 22g
- Fiber: 1g
- Protein: 4g
- Cholesterol: 0mg
Keywords: homemade bread, easy white bread, beginner bread recipe