Introduction to Mini Cannoli Cups
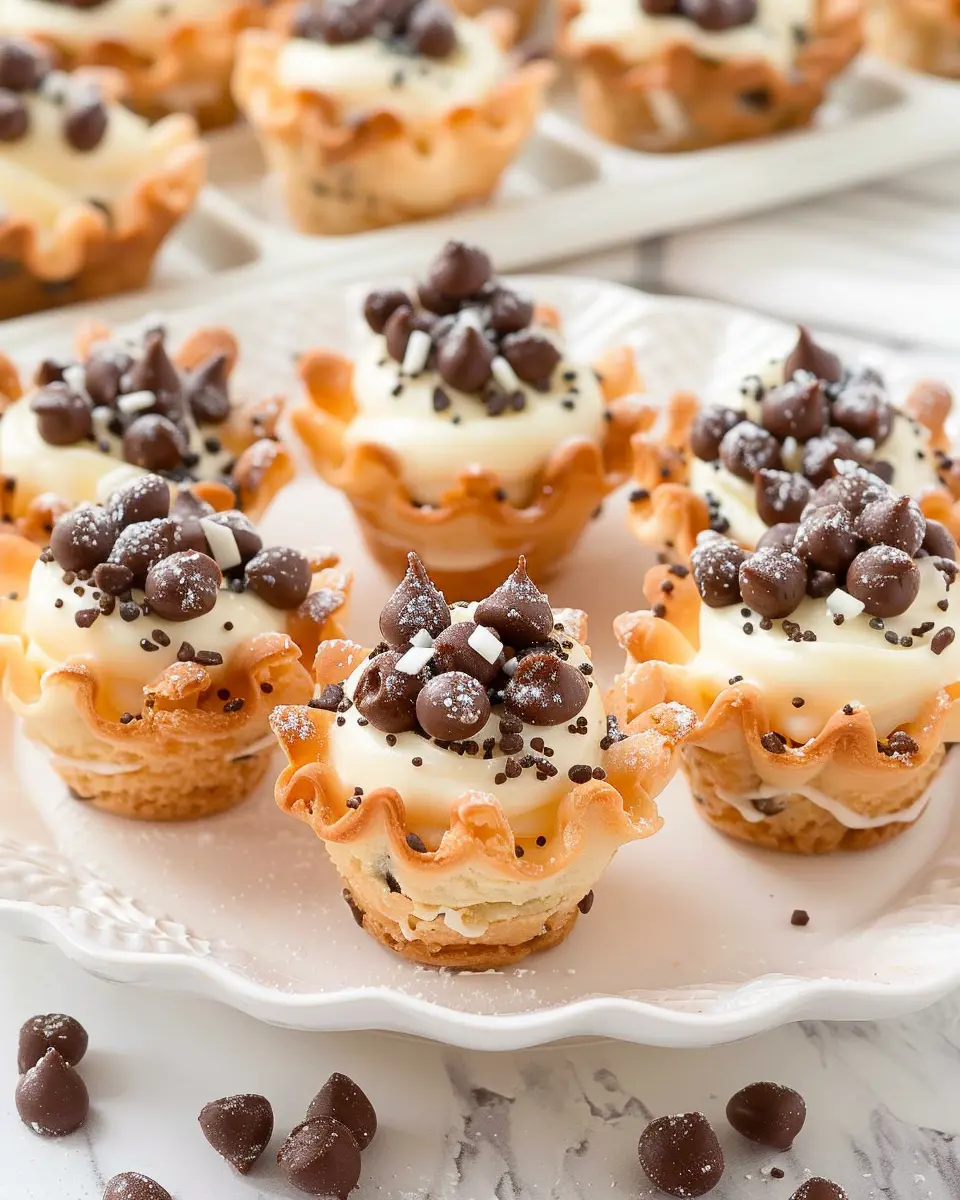
Have you ever found yourself craving something sweet but not wanting to go overboard? Enter the charm of mini cannoli cups. These delightful treats are more than just cute desserts; they offer a little taste of Italy wrapped up in a convenient, bite-sized package. Imagine creamy ricotta filling, bursting with flavor, snugly nestled in a crisp shell. What’s not to love?
What makes mini cannoli cups a delightful treat? For starters, they’re versatile. Whether you’re hosting a dinner party or enjoying a quiet evening at home, mini cannoli cups can elevate any occasion. Their size allows for easy sharing (or not!), and they can cater to different palates. You can infuse the filling with chocolate chips, candied orange, or even a touch of espresso for that extra zing! Plus, they’re a great opportunity to showcase your creativity.
Another reason to love these treats is their preparation. You can whip them up in no time, especially if you’re using pre-made shells. A recent study from The National Restaurant Association suggests that 61% of diners prefer desserts that are easy to share. With mini cannoli cups, sharing is a breeze as each cup is just a perfect bite.
If you’re a fan of desserts that look as good as they taste, mini cannoli cups are your ticket to culinary applause. Drizzle them with chocolate sauce or sprinkle with chopped pistachios for a stunning presentation. Not only do they please the taste buds, but they also please the eyes—a key factor in enjoying food. For more inspiration, check out this article on dessert plating techniques.
So, are you ready to dive into the world of mini cannoli cups? The satisfying crunch of the shell combined with the creamy filling will have you coming back for more. Whether you keep them as a personal indulgence or share them with your favorite people, these mini delights are worth every bite. Let’s get started on crafting these delicious little masterpieces!
Ingredients for Mini Cannoli Cups
Creating scrumptious mini cannoli cups requires the perfect blend of essential ingredients that capture the classic Italian dessert’s charm while keeping it bite-sized.
Essential Ingredients for the Cups
To make the outer cups, you’ll need:
- Pastry dough: You can use ready-made dough for convenience or whip up a batch from scratch.
- Granulated sugar: A touch of sweetness is key to enhance flavor.
- Egg wash: This gives your cups a beautiful, golden finish when baked.
- Cinnamon: A pinch can elevate the flavor, giving it that beloved warm kick.
If you’re in the mood for a quick tutorial, check out this pastry-making guide.
Filling Ingredients Breakdown
Now, let’s dive into the luxurious filling that makes these mini cannoli cups irresistibly delightful. You’ll need:
- Ricotta cheese: The star ingredient! It’s creamy, subtly sweet, and oh-so-delicious.
- Powdered sugar: For that perfect balance of sweetness, it dissolves smoothly.
- Vanilla extract: Adds a warm, inviting flavor.
- Chocolate chips: For texture and a hint of rich chocolate.
And, if you like a bit of zest, consider adding some orange or lemon zest; it brightens up the filling beautifully! After preparing these ingredients, you’ll be ready to craft a dessert that impresses your friends and family alike!
Preparing Mini Cannoli Cups
Making mini cannoli cups is an enjoyable culinary adventure that invites you to blend flavors and textures in a delightful way. Whether you’re hosting a party or just want to satisfy your sweet tooth, these bite-sized treats are sure to impress! Let’s dive into the preparation process step by step.
Gather Your Ingredients
To create the perfect mini cannoli cups, start by collecting all the necessary ingredients. Here’s what you’ll need:
-
For the pastry shells:
-
1 package of pre-made puff pastry (thawed)
-
1 egg (for egg wash)
-
1 tablespoon granulated sugar
-
For the cannoli filling:
-
1 cup ricotta cheese
-
1 cup mascarpone cheese
-
½ cup powdered sugar (adjust to taste)
-
1 teaspoon vanilla extract
-
½ cup mini chocolate chips
-
Optional: zest of one orange for added flavor
You can find high-quality ricotta and mascarpone at your local grocery store or specialty cheese shops. Freshness is key, so opt for brands with minimal processing for the best taste!
Prepare the Cannoli Cups
Once you have your ingredients ready, it’s time to prep for those mini cannoli cups. Start by rolling out the thawed puff pastry on a lightly floured surface. Use a round cookie cutter to cut out circles of pastry slightly larger than your muffin tin cups. For a hint of sweetness, sprinkle granulated sugar onto the pastry circles before placing them in the tin.
Bake the Pastry Shells
This step is simple yet critical. Preheat your oven to 375°F (190°C). Gently press the rolled pastry circles into the wells of your muffin tin to create a cup shape. Use a fork to poke a few holes in the bottom of each pastry to prevent it from puffing up too much during baking.
Brush each cup with an egg wash (beaten egg) for that golden-brown finish. Bake them in the preheated oven for about 12-15 minutes until they are puffed and golden. Keep an eye on them, as oven temperatures can vary! Once baked, allow them to cool completely before adding the filling.
Make the Creamy Filling
While the pastry cups are cooling, let’s whip up that heavenly filling. In a mixing bowl, combine the ricotta cheese, mascarpone cheese, powdered sugar, and vanilla extract. Blend until smooth and creamy. If you’re feeling adventurous, fold in the orange zest for a refreshing twist. The mini chocolate chips add that classic cannoli touch, providing delightful little bursts of sweetness!
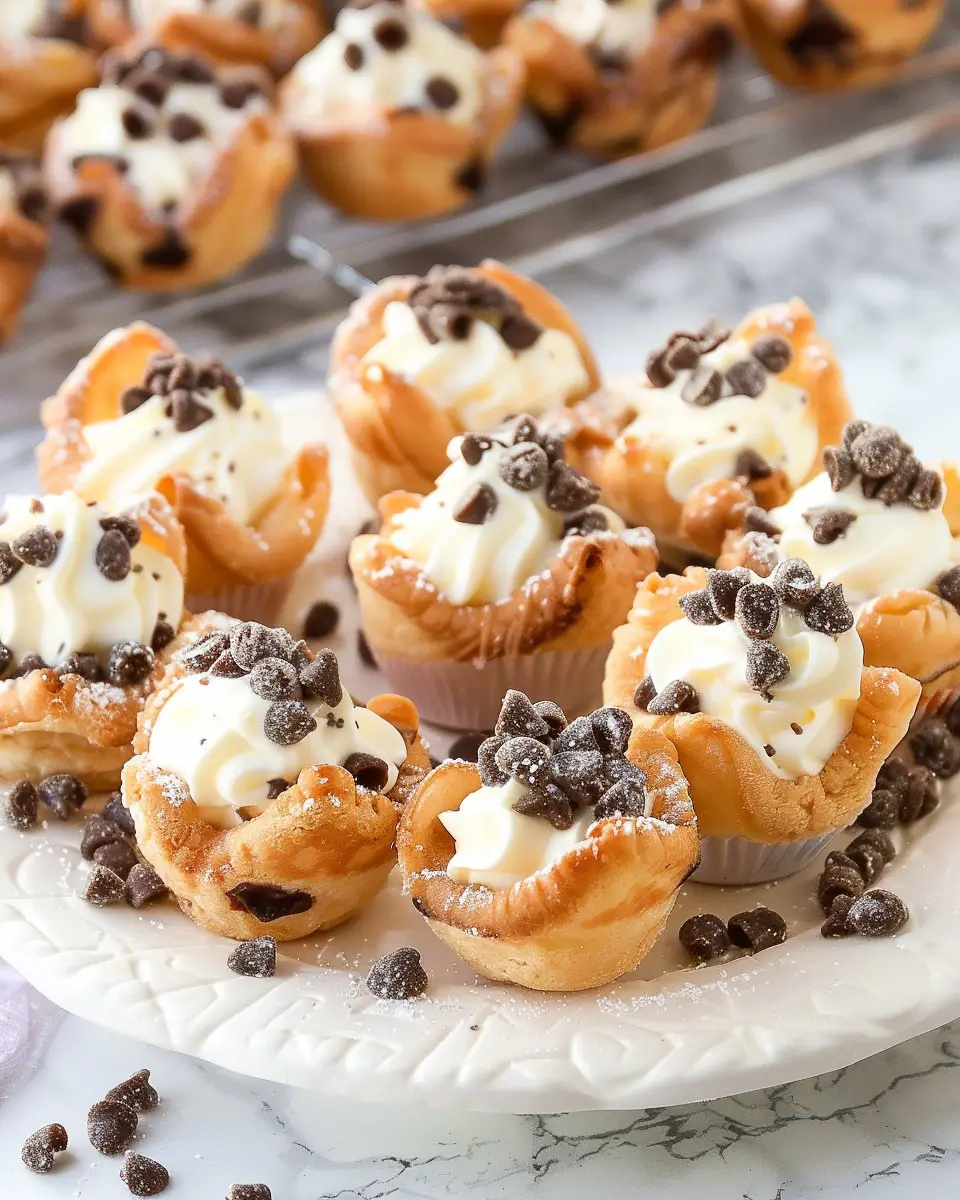
Pipe the Filling into the Cups
Now comes the fun part! Once your pastry cups are completely cool, transfer the creamy filling into a piping bag fitted with a star tip (or just snip the corner of a zip-lock bag if you don’t have a piping bag on hand). Generously fill each pastry cup to the top, allowing the filling to overflow slightly for that indulgent look.
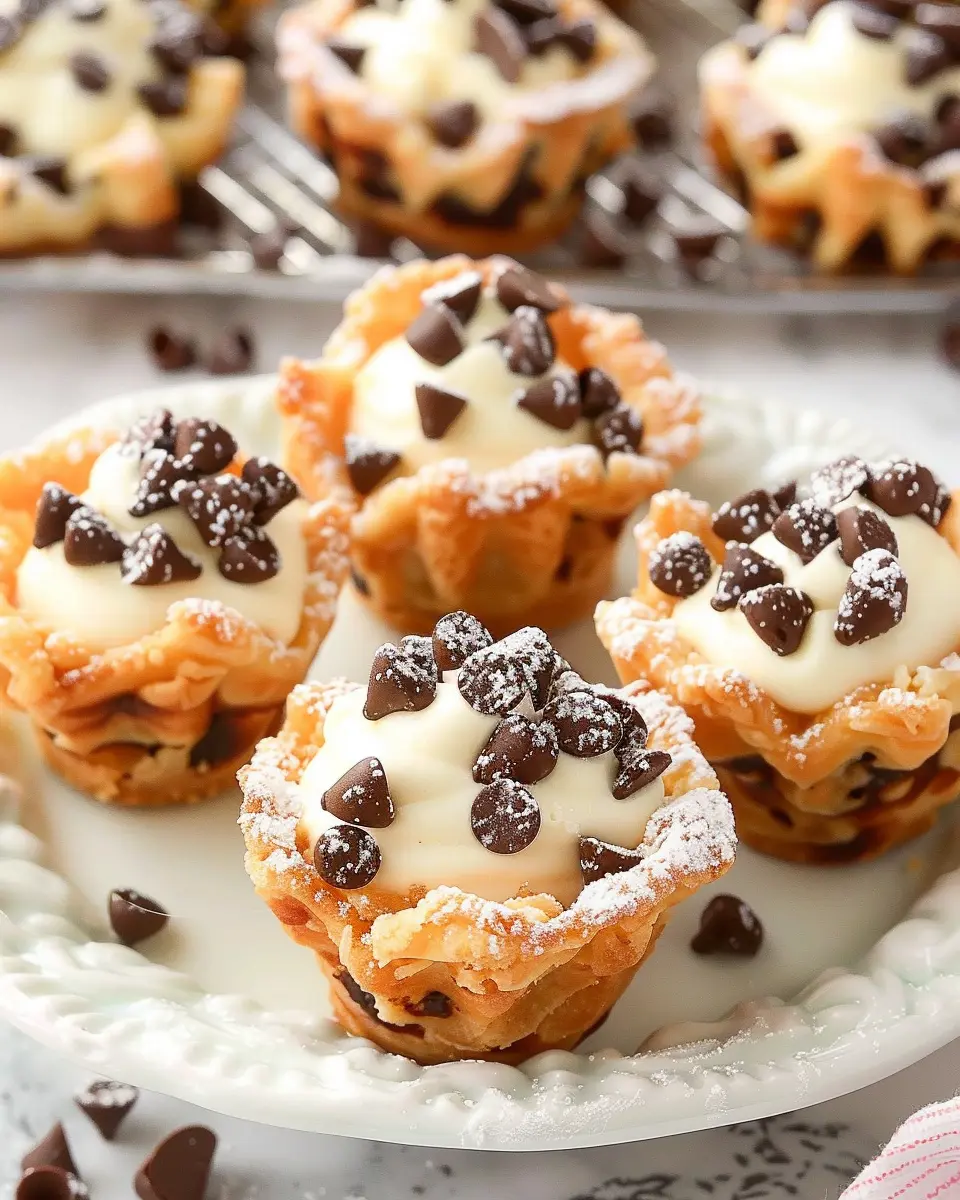
Garnish and Serve
Finally, it’s time to dress up your mini cannoli cups. To add a decorative touch, you can sprinkle the top with additional mini chocolate chips, a dusting of powdered sugar, or even some crushed pistachios for a pop of color. Serve these delightful treats immediately or refrigerate briefly to let the flavors meld.
And there you have it—your own stunning mini cannoli cups! Perfect for parties, gatherings, or just a sweet snack, these treats are sure to be a hit. For more tips on creating delicious desserts, why not check out this insightful guide on Food Network to elevate your baking skills? Enjoy your culinary creation!

Variations on Mini Cannoli Cups
If you think mini cannoli cups are delightful as they are, wait until you try these delicious variations! Each brings its own unique twist to this classic Italian treat, making them perfect for any occasion.
Chocolate-Dipped Mini Cannoli Cups
Who can resist chocolate? To create chocolate-dipped mini cannoli cups, start by melting your favorite chocolate—dark, milk, or even white chocolate work beautifully. Dip the rim of each cup into the melted chocolate, then let them set on parchment paper for a few minutes. This adds an extra layer of indulgence and pairs beautifully with the creamy ricotta filling. For an added crunch, consider sprinkling chopped nuts or sprinkles over the chocolate while it’s still warm. You can find helpful chocolate-dipping techniques on sites like Serious Eats.
Fruit-Filled Mini Cannoli Cups
For a refreshing take, consider fruit-filled mini cannoli cups. Simply fold in diced seasonal fruits like strawberries, blueberries, or even diced peaches into your creamy filling. This not only adds vibrant color but also a burst of flavor and freshness that contrasts wonderfully with the rich creaminess. Pair your cannoli with a drizzle of honey or a squeeze of lemon juice for a touch of zest. You can learn more about coordinating flavors with fresh fruits at Epicurious.
These fun variations on mini cannoli cups ensure that there’s something for everyone, whether you’re hosting a dinner party or looking for a casual sweet treat at home. So why not experiment with these ideas, and elevate your classic dessert to new heights? You might just discover your new favorite version!
Cooking Notes for Mini Cannoli Cups
Tips for Perfect Pastry Texture
To achieve that delightful crunch in your mini cannoli cups, remember to roll your dough thinner than you might think—roughly 1/8 inch works well! Keep an eye on the frying time; overcooking can lead to a tough texture. Aim for a light golden brown, which will ensure a perfect crispy shell. If you have a kitchen thermometer, target around 350°F for frying. This will create perfectly cooked, airy crispy delights every time!
Simple Adjustments for Dietary Needs
Want to adapt the mini cannoli cups for a gluten-free diet? Substitute all-purpose flour with a good gluten-free blend. You can also swap the ricotta with a dairy-free alternative like almond or coconut-based yogurt for a vegan twist. Just be cautious with sweetness levels; different alternatives may require slightly adjusting the sugar for the right balance. If you’re curious about more dietary swaps, check out resources like Nutrition.gov for additional tips.
Happy cooking! Enjoy every bite of your delicious mini cannoli cups!
Serving suggestions for Mini Cannoli Cups
Pairing Mini Cannoli Cups with Coffee
Nothing compares to the bliss of enjoying mini cannoli cups alongside a fragrant cup of coffee. The richness of your favorite brew complements the sweet, creamy filling of the cannoli beautifully. For a truly delightful experience, consider trying:
- Espresso: The bold flavors match perfectly with the sweet filling.
- Cappuccino: The frothy milk adds a creamy texture that pairs well.
Feeling adventurous? Why not explore different coffee styles! A mocha or even a vanilla latte can bring out unique notes in the mini cannoli cups, making your dessert experience even more enjoyable.
Creative Presentation Ideas
How you present your mini treats can elevate your gathering! Consider these fun ideas:
- Dessert Bar: Create a mini dessert station where your guests can assemble their own cannoli cups with various toppings like chopped nuts, chocolate chips, or fresh fruit.
- Colorful Plates: Use vibrant dishes or tiered stands to make your mini cannoli cups pop.
For more inspiration, check out this guide on creative dessert presentations. With a little thought, you can turn a simple treat into a show-stopping finale!
Time Breakdown for Mini Cannoli Cups
Knowing how long it takes to make these delightful mini cannoli cups can help you plan your dessert adventure perfectly!
Preparation Time
Get ready to roll! The preparation of these mini cannoli cups takes about 30 minutes. This includes gathering your ingredients, mixing the filling, and assembling the cups. If you’re multitasking, you might even finish a bit quicker!
Baking Time
You’ll need approximately 15 minutes for baking the shells. Keep an eye on them in the oven as they transform into golden perfection. Baking is an essential step to achieve those crisp, flaky shells.
Total Time
In total, you’re looking at around 45 minutes from start to finish. Perfect for a weekend project or a sweet treat after a busy workday. Since these are easy to whip up, why not invite a friend over and make it a fun evening?
If you’re curious about other delicious recipes or tips for making your desserts shine, check out reputable resources like The Joy of Baking or Food Network. Happy baking!
Nutritional Facts for Mini Cannoli Cups
Calories per Serving
When you indulge in mini cannoli cups, you can expect approximately 120 calories per serving. This makes them a delightful yet manageable treat for any dessert lover. Feel free to enjoy these without the guilt, especially if you’re mindful of portion sizes!
Sugar Content
Each mini cannoli cup contains around 8 grams of sugar. This sweetness comes from ingredients like ricotta and powdered sugar, which create that classic lovely flavor. For a healthier twist, consider using alternative sweeteners or reducing sugar for a less sugary version without sacrificing taste.
Protein Breakdown
These little delights aren’t just tasty; they also offer a protein boost! Each serving has about 3 grams of protein, thanks to the ricotta cheese. Pairing your mini cannoli cups with a source of protein-rich Greek yogurt can elevate the dish even further while adding creaminess.
For more insights into healthy dessert alternatives, check out Healthline for up-to-date nutritional information and tips. Whether you’re treating yourself on a special occasion or simply satisfying a sweet tooth, these mini cannoli cups can be enjoyed in a balanced way!
FAQs about Mini Cannoli Cups
How can I make mini cannoli cups ahead of time?
Preparing mini cannoli cups in advance can be a game-changer, especially if you’re planning for a party or gathering. You can make the cups and filling separately:
- Cups: Bake the pastry shells and store them in an airtight container at room temperature for up to 2 days. This keeps them crunchy and ready for filling.
- Filling: Whip up your ricotta or mascarpone filling and store it in the refrigerator for up to a week. Just remember to assemble the cups just before serving so they maintain that delightful crispiness.
What are some tips for keeping the cups crispy?
Nothing is worse than soggy pastry! To ensure your mini cannoli cups stay crispy, consider these tips:
- Fill just before serving: Keep the filling separate until you’re ready to dig in.
- Avoid moisture: When making the filling, ensure it’s not too watery. Drain the ricotta overnight for the best results.
- Store properly: As mentioned before, store the shells in an airtight container; exposure to air can lead to moisture buildup.
Can I use alternative sweeteners for the filling?
Absolutely! If sugar is off the menu, feel free to experiment with alternative sweeteners like honey, agave nectar, or even stevia. Just keep in mind that some sweeteners don’t have the same volume as sugar, so you might need to adjust the quantity accordingly. For more insights on sweetener swaps, check out the American Diabetes Association.
With these tips, you’re all set to whip up some fantastic mini cannoli cups that will impress friends and family alike!
Conclusion on Mini Cannoli Cups
Why you should try making mini cannoli cups at home
Making mini cannoli cups at home is a delightful experience that combines creativity with satisfying flavor. These bite-sized treats not only impress your guests but also allow you to customize the filling to your preference—think ricotta, chocolate chips, or even a hint of citrus zest!
By preparing these at home, you save money and can control the quality of ingredients. Plus, it’s a fun weekend project! Your friends and family will love indulging in these scrumptious desserts, and they are perfect for any gathering. So why not give it a go? Your taste buds will thank you!
For more insights on homemade desserts, check Bon Appétit for similar recipes and tips.
PrintMini Cannoli Cups: Indulgent Treats That Reinvent Dessert Time

These Mini Cannoli Cups are a delightful twist on a classic dessert, perfect for any occasion. They offer a perfect balance of crispy shells filled with a creamy, sweet filling that will satisfy your cravings.
- Prep Time: 15 minutes
- Cook Time: 0 minutes
- Total Time: 45 minutes
- Yield: 12 servings 1x
- Category: Dessert
- Method: No-bake
- Cuisine: Italian
- Diet: Vegetarian
Ingredients
- 1 cup ricotta cheese
- 1/2 cup powdered sugar
- 1/2 teaspoon vanilla extract
- 1/4 cup mini chocolate chips
- 12 phyllo cups
- 2 tablespoons chopped pistachios
Instructions
- In a mixing bowl, combine ricotta cheese, powdered sugar, and vanilla extract until smooth.
- Fold in mini chocolate chips.
- Spoon the mixture into the phyllo cups.
- Top with chopped pistachios.
- Chill for at least 30 minutes before serving.
Notes
- For an extra touch, drizzle melted chocolate over the filled cups before serving.
- Feel free to swap chocolate chips with other mix-ins like dried fruit or almonds.
Nutrition
- Serving Size: 1 cup
- Calories: 150
- Sugar: 10g
- Sodium: 50mg
- Fat: 8g
- Saturated Fat: 2g
- Unsaturated Fat: 5g
- Trans Fat: 0g
- Carbohydrates: 15g
- Fiber: 1g
- Protein: 3g
- Cholesterol: 15mg
Keywords: Mini Cannoli Cups, dessert, indulgent treats, recipes