Introduction to Peanut Butter Crunch Cups
Creating delicious homemade treats is not just about satisfying a sweet tooth; it’s about embracing creativity in the kitchen. When you whip up your own peanut butter crunch cups, you get to control every ingredient, ensuring a balance of flavor and health that store-bought options often lack. Wouldn’t it be great to know exactly what goes into your delicious snacks?
Why Homemade Treats are Worth It
There’s something truly special about making treats at home. Apart from the obvious benefits of freshness and flavor, homemade snacks often come with fewer preservatives and added sugars compared to mass-produced versions. A study published by the Harvard T.H. Chan School of Public Health reveals that replacing processed foods with homemade options can significantly improve your overall nutrition.
When you dive into making peanut butter crunch cups, you’ll experience a direct connection to your treats. Picture this: the warm, nutty aroma of peanut butter filling your kitchen while melted chocolate swirls around it. Who can resist that? Plus, the joy of pulling a tray of perfectly formed cups from the fridge after a simple breather is undeniably rewarding.
Moreover, making these treats allows you to customize them to suit your taste. Want to add a sprinkle of sea salt to enhance the flavors? Go for it! Prefer an extra crunch? Toss in some nuts or seeds. You don’t have to adhere to a recipe strictly; consider it more of a guideline to unleash your creativity.
For those of us who are constantly balancing our busy lives, cooking might seem like a chore. However, the production of easy-to-make snacks like these peanut butter crunch cups can provide a therapeutic escape. Engaging in hands-on activities like cooking can help relieve stress, as noted by experts from the American Psychological Association.
Think about it: you can make a large batch of these delightful cups upfront. They serve as the perfect on-the-go snack or a sweet post-work treat. Plus, they are a hit at gatherings, and you’ll love hearing your friends demand the recipe! So why not gather your ingredients and give it a try? You might just find that homemade treats are not only worth the effort but are also a delightful addition to your culinary repertoire.
Ingredients for Peanut Butter Crunch Cups
When you’re craving a delightful treat that’s not only delicious but also easy to make, peanut butter crunch cups are the answer! Here’s the rundown on what you’ll need to whip up this delightful snack.
Essential Ingredients
- 1 cup creamy peanut butter: Opt for a high-quality, natural variety for the best flavor.
- 1/2 cup honey or maple syrup: This will add the perfect sweetness—plus, it’s a healthier alternative to refined sugar.
- 3 cups crispy rice cereal: This ingredient provides that irresistible crunch.
Optional Add-Ins
- 1/2 cup dark chocolate chips: Melting these on top can elevate your cups to the next level.
- A pinch of sea salt: A touch of salt enhances the sweetness and balances flavors beautifully.
Tips for Success
Make sure to check that all ingredients are at room temperature. This ensures a smoother blending of the peanut butter and sweetener, which is vital for achieving that perfect texture.
Ready to get started? Grab these ingredients, and let’s create some peanut butter crunch cups that will have everyone asking for seconds! If you’re looking for more ideas on variations, check out these simple snack ideas for inspiration.
Step-by-Step Preparation for Peanut Butter Crunch Cups
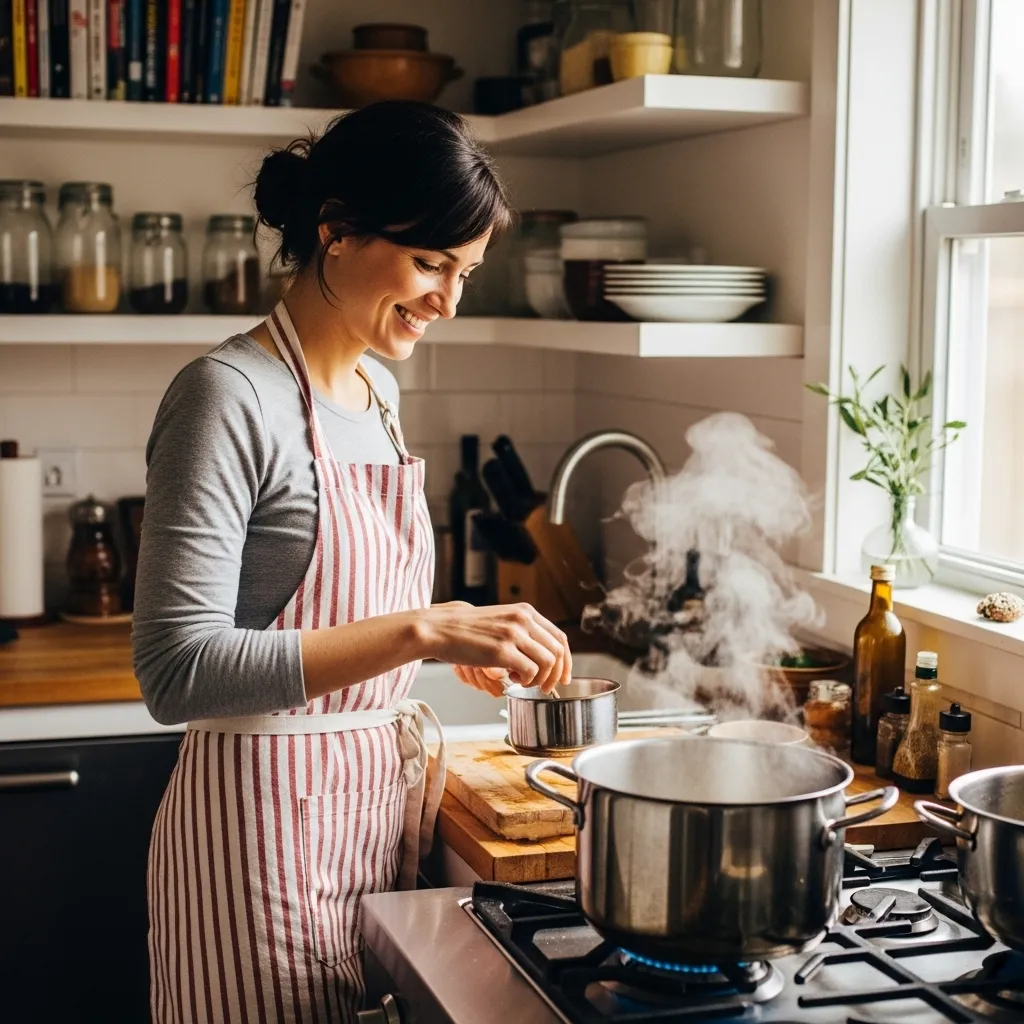
Creating peanut butter crunch cups at home can be a delightful experience, especially when you can customize every step to suit your taste. Let’s walk through this enjoyable process together, ensuring that your cups turn out both delicious and impressive.
Melting the Chocolate
To start, you’ll need to melt some chocolate. Choose your favorite type—dark, milk, or even white chocolate work beautifully.
- Choose a Good Quality Chocolate: Using high-quality chocolate will enhance the flavor significantly.
- Double Boiler Method: Set up a double boiler by placing a heatproof bowl over a pot of simmering water. Stir the chocolate regularly until it melts smoothly.
- Microwave Option: If you’re short on time, simply microwave chocolate in a microwave-safe bowl, heating in 30-second intervals and stirring in between until fully melted.
Melted chocolate forms the base of our crunchy cups, adding richness and a wonderful texture that complements the peanut butter perfectly. For more details on melting chocolate, you can explore Serious Eats’ guide.
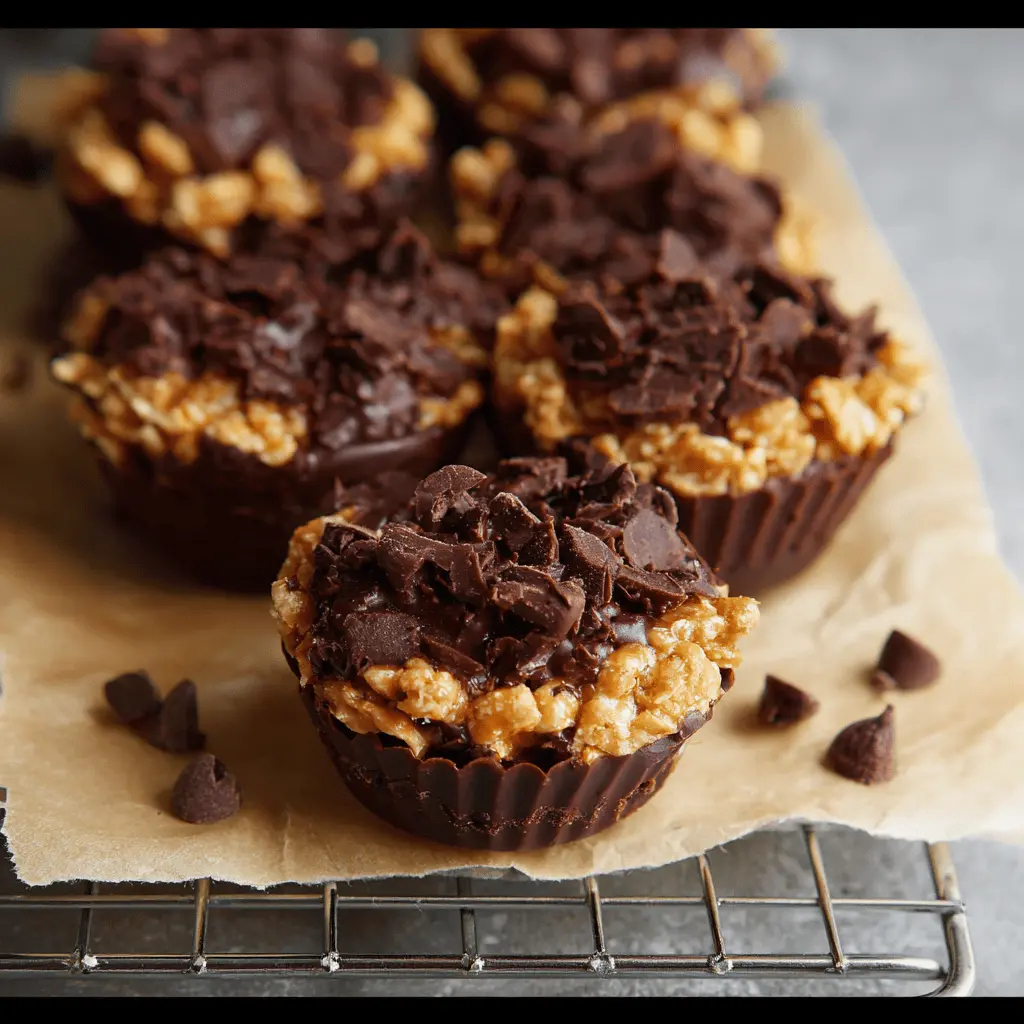
Combining Chocolate with Cereal
Once your chocolate is melted, the next step is to add some crunch.
- Choose Your Cereal: Use crispy rice cereal or any similar cereal that will hold its shape without becoming soggy.
- Mixing: Pour the melted chocolate over the cereal in a large bowl. Gently fold until all pieces are evenly coated—a wooden spoon or spatula works well here. You should see a delightful, glossy mess that will create that essential crunch in your peanut butter crunch cups.
The combination of smooth chocolate and crispy cereal is delightful, and it’s hard to resist tasting this mixture!
Filling the Mini Muffin Tin
Now, it’s time to assemble your cups.
- Prepare Your Tin: Line a mini muffin tin with paper liners to make it easy to remove the cups later.
- Spoon in the Mixture: Using a spoon or small scoop, fill each muffin holder about halfway with the chocolate-cereal mix. Press down gently to create a solid base.
Don’t worry about making them perfect; the imperfections add character and charm to your homemade treats.
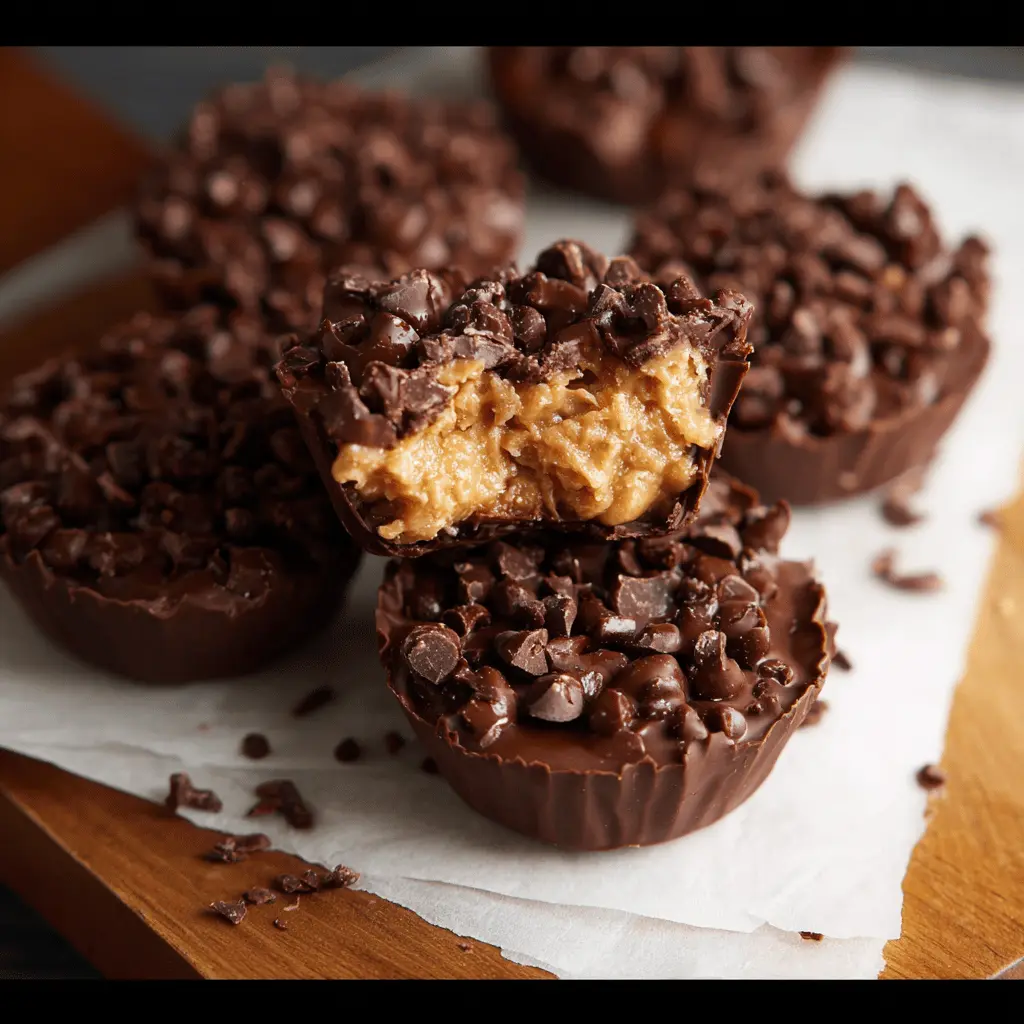
Adding the Peanut Butter
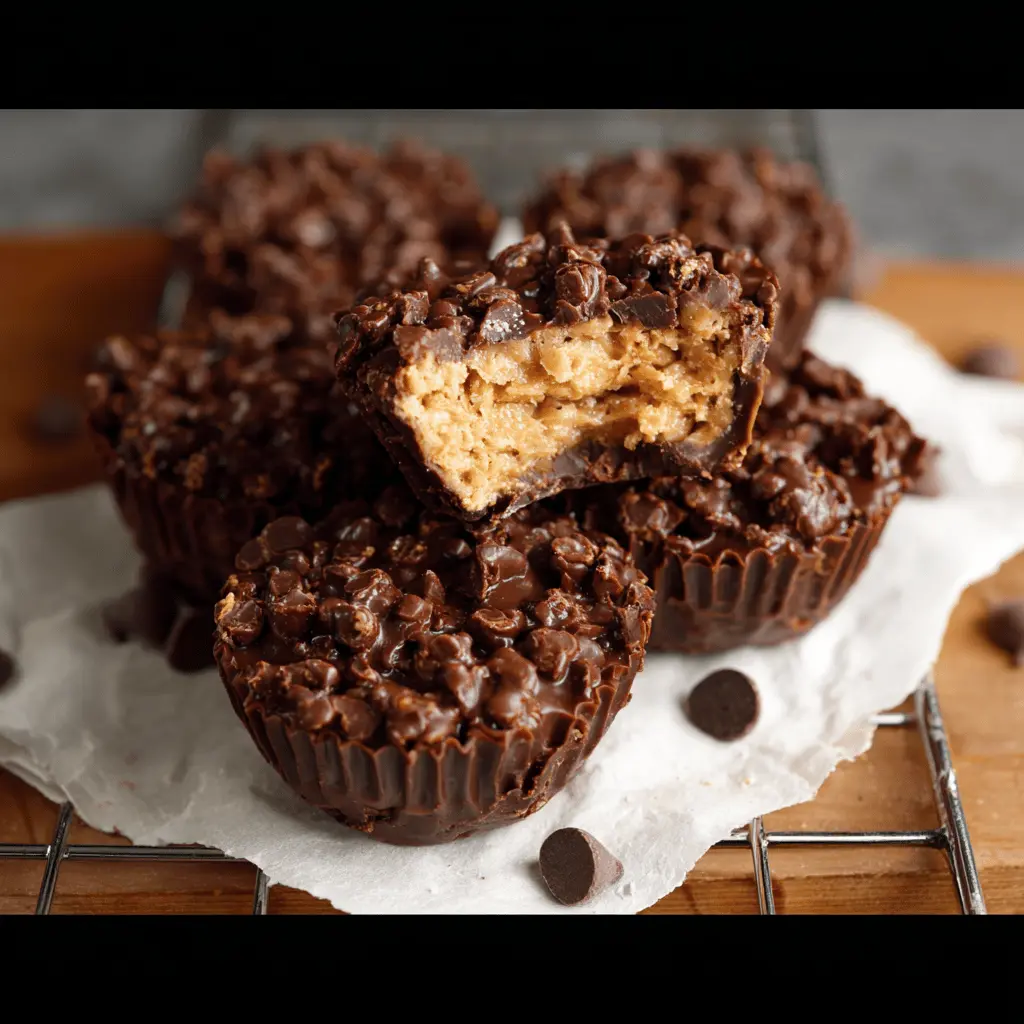
Ah, the heart of the peanut butter crunch cups! This is where the magic happens.
- Select the Peanut Butter: Choose creamy or crunchy peanut butter based on your preference. Natural varieties without added sugar can offer a healthier option.
- Layering: Take a spoonful of peanut butter and drop it onto the chocolate base. You can use a swirl motion for a beautiful marbled effect or simply dollop it right in the center.
This layer of peanut butter is the perfect bridge between the crunch of the base and the sweetness of the final layer. Plus, it adds protein, making your cups a slightly healthier treat!
Final Layer and Freezing
To finish off your peanut butter crunch cups, we need one last chocolate layer.
- Top It Off: Carefully spoon more melted chocolate over the peanut butter layer, ensuring that everything is sealed in.
- Smooth It Out: Use a spatula to spread it evenly across the top. This final layer not only makes your cups look more appealing but also gives them that satisfying chocolatey finish.
- Freeze: Place the muffin tin in the freezer for about 30 minutes, or until the chocolate is fully set.
Once set, simply pop them out of the tin and store them in the refrigerator or freezer in an airtight container—if they last that long!
Making peanut butter crunch cups is not just about following a recipe; it’s about enjoying the process and, of course, the scrumptious results. Grab some friends or family to help, and don’t forget to taste test along the way—you deserve it!
Variations on Peanut Butter Crunch Cups
Crunch Cups with Almond Butter
Looking for a delightful twist on your classic peanut butter crunch cups? Swap out the peanut butter for almond butter! This makes for a nutty and slightly sweeter treat that some may prefer. Almond butter also boasts a different nutritional profile; it’s rich in vitamin E and magnesium, adding a healthful boost to your indulgent snack.
To make these crunchy cups, simply replace almond butter for peanut butter in your favorite recipe. You can even mix in some chopped almonds for added texture and a delightful crunch!
Peanut Butter Crunch Cups with Sweet Additions
Another way to elevate your peanut butter crunch cups is by incorporating sweet additions.
-
Chocolate Drizzle: Melt some dark chocolate and drizzle it over the tops for a decadent finish. Dark chocolate not only adds a luxurious taste but also antioxidants, making it a guilt-free treat!
-
Dried Fruits: Elevate the flavor with dried cranberries or raisins. They provide a beautiful contrast to the rich, creamy peanut butter and add a burst of natural sweetness that balances everything perfectly.
-
Sprinkles: For an eye-catching touch, consider adding colorful sprinkles on top. This makes your peanut butter crunch cups not only more fun but also a great hit at parties!
These variations are not just fun to make; they allow you to cater to different tastes, whether you’re cooking for a family gathering or just treating yourself to something special. Plus, experimenting in the kitchen can be one of the best ways to unwind after a long day!
For more inspiring recipe ideas, check out Food Network’s dessert section or Bon Appétit for sweet inspirations.
Cooking Tips and Notes for Peanut Butter Crunch Cups
When making peanut butter crunch cups, getting the balance of flavors and textures just right is key. Here are some friendly tips to elevate your dessert game:
Choose Quality Ingredients
Selecting high-quality peanut butter, chocolate, and crunchy toppings can dramatically enhance the flavor of your cups. Opt for natural peanut butter with no added sugars or oils for a tastier result.
Mind the Melting
When melting chocolate, do it gently! Overheating can cause it to seize. Try a double boiler or microwave in short bursts, stirring in between to ensure a smooth consistency. Remember, patience pays off!
Customize Your Crunch
Feel free to experiment with different crunchy ingredients. Chopped nuts, crispy rice, or even granola can create a unique texture in your peanut butter crunch cups.
Proper Storage
Store your cups in an airtight container at room temperature for a day or two, or in the fridge for longer freshness. This helps them maintain that delightful crunch.
For more details on chocolate melting methods, check out this resource that illustrates the process beautifully! Happy cooking!
Serving Suggestions for Peanut Butter Crunch Cups
Peanut butter crunch cups are not just a delightful treat; they can also be a versatile base for various delicious pairings. Here are some serving suggestions to elevate your experience:
Snack Time Boost
These peanut butter crunch cups make for an excellent afternoon snack. Pair them with fruit, like banana slices or apple wedges, for a refreshing contrast to the rich and creamy peanut butter. The natural sweetness of the fruit complements the crunchy texture perfectly.
Gather Your Friends
Planning an informal gathering? Create a dessert platter! Arrange your peanut butter crunch cups alongside an assortment of cookies and brownies. This way, your guests can mix and match flavors, making for an enjoyable dessert experience.
Beverage Pairings
When it comes to beverages, consider serving these delicious cups with a chilled glass of milk or a creamy almond milk latte. Both will enhance the rich flavors while providing a satisfying experience.
Personal Touch
I’ve found that a drizzle of honey or a sprinkle of sea salt on top can elevate these cups to another level. Don’t hesitate to experiment with toppings that you love—your creativity is the limit!
For more ideas and recipes, check out Food Network’s dessert section for inspiration and guidance!
Time Breakdown for Peanut Butter Crunch Cups
Getting into the kitchen to whip up some peanut butter crunch cups is an exciting adventure! Here’s how you can manage your time effectively to create these delightful treats without any stress.
Preparation Time
Plan for about 15 minutes for preparation. This includes measuring out ingredients, mixing, and portioning your peanut butter crunch cups. It’s the perfect time to put on some music and let your creativity flow!
Freezing Time
Once assembled, your cups will need a little chill time in the freezer. Aim for about 30 minutes, enough to firm them up without turning them into ice blocks.
Total Time
In total, you’ll spend around 45 minutes to enjoy your homemade peanut butter crunch cups. With such a short commitment, why not make a double batch?
For more tips on food prep efficiency, check out Meal Prep on Budget. It’s a great way to streamline your cooking and save time in the long run!
Nutritional Facts for Peanut Butter Crunch Cups
When you whip up a batch of peanut butter crunch cups, you’ll be pleased to know they’re not just delicious but also provide some solid nutrition. Here’s a breakdown of key nutritional facts to keep in mind:
Calories
Each peanut butter crunch cup contains approximately 120 calories. This makes them a satisfying yet guilt-free treat, perfect for those mid-afternoon cravings. Moderation is key, but these cups can easily fit into a balanced diet.
Sugar
With about 6 grams of sugar per cup, these treats are sweetened without going overboard. If you’re keeping an eye on sugar intake, consider using natural sweeteners like honey or maple syrup, which can offer a healthier option.
Protein
Thanks to the peanut butter base, each cup packs around 4 grams of protein. This is a great way to help fuel your day, especially as a pre- or post-workout snack. The protein content helps keep you full longer, so you can stay focused on your tasks.
For more detailed nutritional information, you might find resources from the USDA or the American Heart Association helpful. Enjoy your peanut butter crunch cups while keeping nutrition in check!
FAQs about Peanut Butter Crunch Cups
Can I make these gluten-free?
Absolutely! To make peanut butter crunch cups gluten-free, simply opt for gluten-free graham crackers or rice cereal as your base. There are various brands available that cater to gluten-sensitive diets. Always check the packaging to ensure they are certified gluten-free, and you’ll be all set for a delicious treat that everyone can enjoy.
How can I store Peanut Butter Crunch Cups?
Storing your peanut butter crunch cups is easy! Simply place them in an airtight container and store them in the refrigerator. They can last up to a week if you follow this method. For longer storage, consider placing them in the freezer; they can maintain their delightful taste for up to three months. Just make sure to layer parchment paper between the cups to prevent them from sticking together.
Can I use different types of chocolate?
Certainly! One of the beautiful things about making peanut butter crunch cups is how versatile they can be. You can use milk chocolate for a sweeter flavor, dark chocolate for a richer taste, or even white chocolate if that’s more your style. Alternatively, consider trying flavored chocolate melts, like caramel or mint, for a unique twist. Just remember to keep an eye on tempering chocolate if you’re melting it—this ensures a smooth finish and better texture.
Feel free to experiment with different types of chocolate, and don’t hesitate to let us know your favorites! If you’re interested in exploring more creative chocolate options, check out this guide on types of chocolate. Happy baking!
Conclusion on Peanut Butter Crunch Cups
Creating scrumptious peanut butter crunch cups is an experience that delights both the palate and the spirit. These treats are not just easy to make; they also offer a satisfying blend of flavors and textures. Imagine the creamy richness of peanut butter harmonizing with the crunchy elements, creating a snack that’s hard to resist.
For those aiming for a healthier twist, consider swapping in ingredients like natural sweeteners or dark chocolate. If you’re ready to impress friends or family, share these delightful bites at your next gathering. Friendly tip: they make for excellent homemade gifts too! Looking for more recipes? Check out other delectable treats to expand your culinary repertoire.
PrintPeanut Butter Crunch Cups: Easy Indulgence for Sweet Lovers

Deliciously simple peanut butter crunch cups that satisfy your sweet tooth.
- Prep Time: 15 minutes
- Cook Time: 0 minutes
- Total Time: 45 minutes
- Yield: 12 cups 1x
- Category: Desserts
- Method: No-Bake
- Cuisine: American
- Diet: Vegetarian
Ingredients
- 1 cup peanut butter
- 1 cup chocolate chips
- 2 cups rice cereal
- 1/2 cup powdered sugar
Instructions
- In a bowl, mix the peanut butter and powdered sugar until well combined.
- Gently fold in the rice cereal and chocolate chips until evenly coated.
- Divide the mixture into cupcake liners and press down evenly.
- Chill in the refrigerator for at least 30 minutes until set.
- Serve and enjoy your delicious peanut butter crunch cups!
Notes
- For a crunchy topping, sprinkle some additional rice cereal on top before chilling.
- You can also add nuts for extra flavor.
Nutrition
- Serving Size: 1 cup
- Calories: 200
- Sugar: 15g
- Sodium: 50mg
- Fat: 12g
- Saturated Fat: 3g
- Unsaturated Fat: 7g
- Trans Fat: 0g
- Carbohydrates: 22g
- Fiber: 1g
- Protein: 5g
- Cholesterol: 0mg
Keywords: Peanut Butter Crunch Cups, easy dessert, sweet treats